


Over 3 dozen people have rated this a perfect 5-star recipe, and with lots of testing ourselves, we agree with is the best masoor dal recipe!
Want to Save This Recipe?
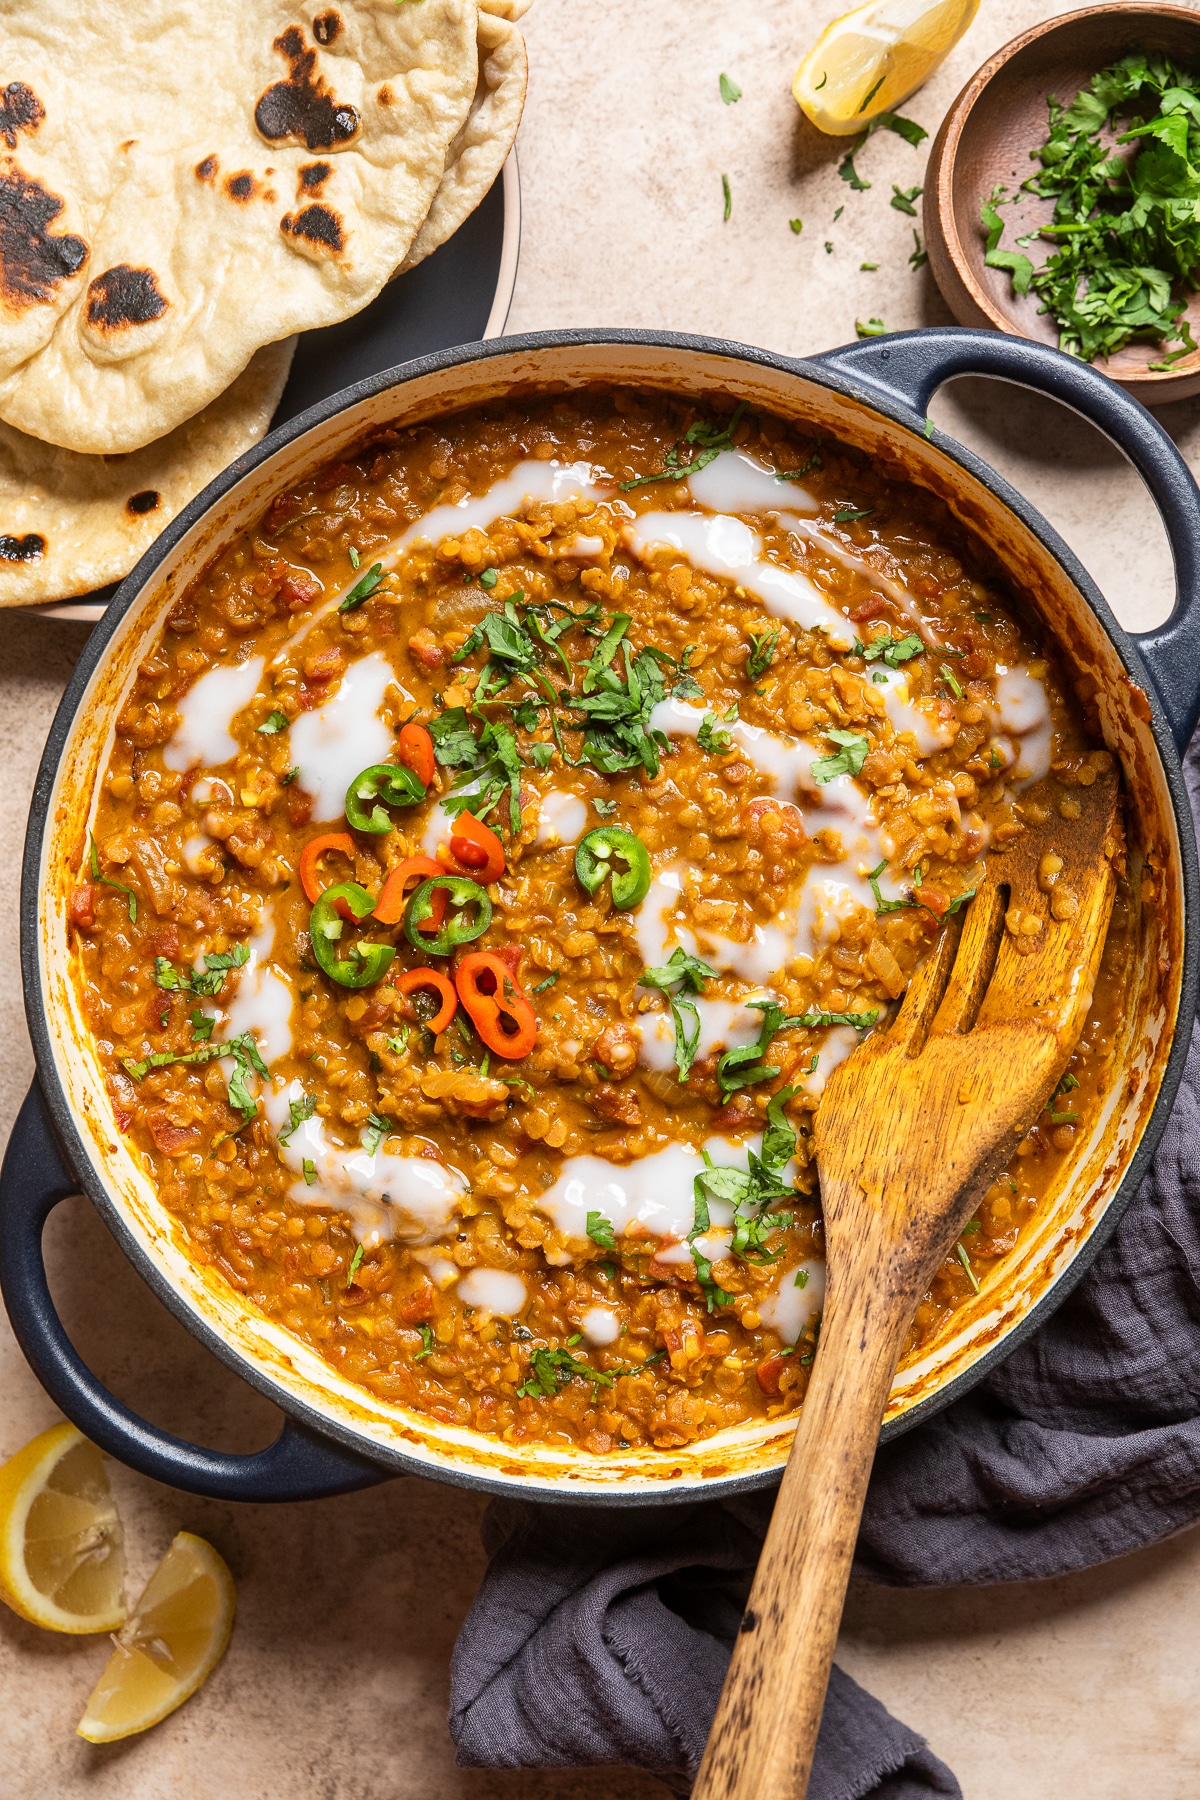
Masoor dal is one of those meals that instantly makes our home feel cozy.
One of the biggest struggles people have with dal is getting the texture right—too thin, too thick, or not creamy enough. But don’t worry! By following my step-by-step instructions, you’ll nail it every time, with perfectly tender lentils in a rich and flavorful sauce.
Whether you’re new to dal or grew up eating it, this recipe is easy, quick, foolproof, and guaranteed to bring warmth and comfort to your table.
It’s the dish our own family turns to when wanting something warm, nourishing, and deeply satisfying—whether it’s a chilly evening or just one of those days that calls for comfort food and we hope it is for your family as well.
Jump to:
- What is Masoor Dal?
- Why You’ll Love This Red Lentil Dal Recipe
- Masoor Dal Recipe Ingredients
- Substitutions and Variations:
- How to Make Masoor Dal
- Tips For Making Red Lentil Dal
- What to Serve With Masoor Dal
- How to Store Red Lentil Dal
- Recipe FAQs:
- Other Vegan Asian-Inspired Recipes to Consider:
- More recipes to try
- 🥳 Get the Full Recipe
- 💬 See What People Are Saying
What is Masoor Dal?
Masoor dal actually means red lentil in Hindi, so it can refer to the lentils themselves or the dish that we are creating here today. The dish is a creamy spiced red lentil tomato and onion based stew that has a soft texture and vibrant flavor profile.
It is loaded with protein and other nutrients while being filling and comforting.
Why You’ll Love This Red Lentil Dal Recipe
- Flavorful – This recipe packs so much flavor in with ingredients that you most likely have a lot of already!
- Nutritionally Dense – There are a lot of vitamins, minerals, and goodness packed into this dish which is perfect for the colder weather season
- Easy – While traditional masoor dal is incredible, we wanted to provide an easier version to inspire others to make this dish and learn more
Masoor Dal Recipe Ingredients

Gather your ingredients!
- Red Lentils – masoor literally tells us what color to use, so in this case you are going to want to use a red or orange lentil.
- Vegetable Stock – we prefer to use a low sodium or homemade stock so that we can adjust the seasoning and salt levels are desired
- Onions, Garlic, and Ginger – our aromatics are going to start the flavor immediately building this dish up
- Full Fat Coconut Milk – this is in a can and creates the perfect creamy texture that we are going for in this recipe
See my recipe card below for a complete list of the ingredients with measurements.
Substitutions and Variations:
- Red Lentils – you can also use brown lentils but realize that it not technically named the same dish. Red lentils also break down more, so brown lentils will hold up more. You may also need more liquid.
- Full Fat Coconut Milk – can be replaced with a thick non-dairy milk like cashew, soy, or creamy oat milk. Other non-dairy milks can be used; however, they are going to take longer to thicken.
- Protein – If you’d like to add some more protein into your dish, things like tofu or vegan chicken or soy curls would be good options

How to Make Masoor Dal

1. In a large heavy bottomed pot, preferably one with high walls, add oil over medium heat.
Once hot, add in onions and let cooked for 8-20 minutes. If you cook for 8 minutes this will get them softened and able to move through the rest of the recipe. However, for more flavor development, allow them to cook for 20 minutes, stirring occasionally, to develop caramelization, being careful not to burn. Add in garlic and ginger and stir together. Let cook until fragrant, another 1-2 minutes.

2. Add in all the seasonings and stir together again. Allow to cook for 1 minute, stirring often, careful not to burn. This is called blooming spices and helps to activate the full flavor of the dried spices which develops layers of flavor from the start.

3. Add in lentils and stir.

4. Then, add the tomatoes, coconut milk and vegetable stock. Scrap the bottom of the pot to remove any of the fond – this is the brown bits that sometimes adhere to the bottom of the pot. Turn heat down to medium and let cook until thickened and lentils are soft (about 15-20 minutes).
Taste your dal and then add in salt, kasuri methi, and lemon juice as desired. Stir together and remove from heat. Top with sliced green chilis at the end if desired. Serve with naan.
Tips For Making Red Lentil Dal
Make sure you’re using red lentils which may also be under orange or pink depending on the store. Other types of lentils have different textures and cooking times. To ensure the accuracy of making this recipe to perfection you will want to use the right type.
Caramelize your onions. We make a note that you can do this recipe quickly by allowing your onions to only softened, however, if you really want to build flavor, then we suggest letting them go longer.
You can omit the green chili if you don’t want any spice to shine through.
What to Serve With Masoor Dal
We serve masoor dal with garlic turmeric rice and naan. This provides a fully balanced meal that it packed with flavor, comfort, and nutrients. If desired, you could also served alongside some steamed or roasted vegetables of your choosing – we love it with our oven roasted cauliflower.
How to Store Red Lentil Dal
To store, you will want to let cool completely and then place in an air-tight container in the refrigerator for 3-5 days.
Alternatively, if you would like to freeze, you can do so by putting your cooled dal in a freezer safe bag or container and store in the freezer for up to 3 months.
Can this be frozen?
Yes. You can let it cool completely and then store it in a freezer safe container for up to 3 months.
Recipe FAQs:
Yes! Only coconut milk is in the recipe and that can be replaced with another thick milk like soy if you can have it or a creamy oat milk. If you use another non-dairy milk you may just need to let it thicken longer.
Yes, this recipe can be made 4-5 days in advance.
Other Vegan Asian-Inspired Recipes to Consider:


More recipes to try

Did you make and love this recipe?
Click the 5 stars in the recipe card above or below in the comment section! This is a great way to support us so we can continue to bring great recipes!
🥳 Get the Full Recipe
Masoor Dal
Ingredients
- 1 tablespoon olive oil
- 1 large yellow onion, diced
- 6-8 cloves garlic, minced
- 1 tablespoon fresh ginger, peeled and grated
- 1 tablespoon garam masala
- 1 teaspoon ground turmeric
- 1 teaspoon coriander
- 1 teaspoon cumin
- 1 teaspoon smoked paprika
- ½ teaspoon cinnamon
- 1 ½ cups dried red lentils, rinsed and soaked* (can sub with orange)
- 14 oz canned diced tomatoes
- 8 oz full fat coconut milk
- 3 cups vegetable broth
- ½ teaspoon salt, more or less to taste
- 1 half a lemon, juiced
- 1 green chili, thinly sliced, optional
- 1 tablespoon kasuri methi, optional
- homemade vegan naan, as a side, optional
Instructions
- In a large heavy bottomed pot, add oil over medium heat. Once hot, add in onions and let cooked for 8-20 minutes*. Add in garlic and ginger and stir together. Let cook until fragrant (another 1-2 minutes).
- Add in all the seasonings (garam masala – cinnamon) and stir together again. Allow to cook for 1 minute, stirring often, careful not to burn.
- Add in lentils and stir. Then, add the tomatoes, coconut milk and vegetable stock. Scrap the bottom of the pot to remove any of the fond. Turn heat down to medium and let cook until thickened and lentils are soft (about 15-20 minutes).
- Taste your dal and then add in salt, kasuri methi, and lemon juice as desired. Stir together and remove from heat. Top with sliced green chilis at the end if desired. Serve with naan.


Absolutely delicious!
That’s all I need to say.
thank you
Thank you so much!
This recipe is the best! I have a goal to make new (to me) recipes and this one is a serious keeper! I forgot to soak the lentils but didn’t seem to matter. Fantastic along with the naan recipe
Thank you so much for giving the recipe a try! We’re happy to hear that you enjoyed it!